
 If you enjoy boating in unfamiliar waters as much as we do, you will quickly find that a GPS can be your best friend. Often times the recreational boater finds that reading compass headings and nautical charts are daunting tasks. With this in mind, we developed Florida By Water with one of the main goals as providing GPS coordinates for every location. This give you the ability to pinpoint the destination that you are trying to find. However, many of us quickly become confused with the new terminology such as waypoints, tracks, and routes. This article will provide you with a few of the basic skills need to navigate to your chosen location. Please note this is in no way a compressive document on the Nautical Navigation.
Basic Terms in Plain English
Waypoint: A waypoint is a specific location such as a restaurant, marina, or boat ramp. When you look at a location at Florida By Water you will find the GPS coordinates for that location. This will be a waypoint that can be added to your GPS. For example, if you were in Key Largo and wanted to snorkel at “Christ the Abyss” you would enter this waypoint into your GPS: 25.1242155, -80.2974027. Your numbers on your GPS may look different and we will explain those differences in a minute. Anyhow, to get to the location, simply enter the waypoint and follow the GPS map to that waypoint. One thing to keep in mind is that your GPS will take you there by a direct line, which in many cases, in not a very viable option.
Route: A route is a series of waypoints used to get you to a specific location. This allows you to go from one waypoint to the next until you reach your destination. This way, you can navigate around obstacles and shallow water. Creating a route on the GPS itself is possible but can become difficult if you have a smaller screen. At Florida By Water, we use route-planning software. This gives us the ability to take our time and create a route in the comfort of our homes on a computer rather than while out on the water and trying to navigate at the same time. Once the route is loaded into your GPS/Chartplotter you can simply select the route and follow it on your GPS screen. It works very similar to the GPS in your car. The difference is that your car GPS will create the best route for you, while the Chartplotter requires you to create the route. Most manufactures have routing software available for a small fee. Garmin has a program called Homeport. This will allow you to create waypoints and routes, and directly upload them to your GPS/Chartplotter unit. https://buy.garmin.com/shop/shop.do?pID=64242
Track: Think of a track as a digital recorder on your GPS. When you turn tracking “on”, the GPS will track the movement of your boat, display it on the unit for you to see, and save it for you. This can be extremely handy if you would like to see where you have been, or to follow the track back to your starting location. The tracks are shown as little black dotted lines on a Garmin unit and the tracks can be downloaded or turned into a route for future reference.
My Numbers Don’t Match!
One of the first show stoppers for new GPS users is finding GPS numbers and realizing they do not look like the numbers on their unit. For example, these sets of numbers all reference the same location:
25.1242155 -80.2974027 (Degrees)
N25°7.45293 W080°17.844162 (Deg° Min)
N25°7'27.176″ W80°17'50.65″ (Deg° Min' Sec”)
Depending on how your GPS is set up, it will use one of these formats. The good news is that it can be changed to use the format of your choice. The key is being able to convert one type of numbers to the other. This website is a great resource for converting the different formats: http://www.gpsvisualizer.com/calculators
Florida By Waters uses “Degrees” as the preferred format. It is also note worthy that you can change the preference in Google Earth to match your preferred format also.
So Many Options
The people at Florida By Water are GPS junkies. I personally have 6 of these handy little devices. With the exception of the iPhone, they are all Garmin. Not that I’m claiming that Garmin is any better than the others; it’s just a matter of familiarity with the interface. There are a few things to keep in mind when purchasing a GPS.
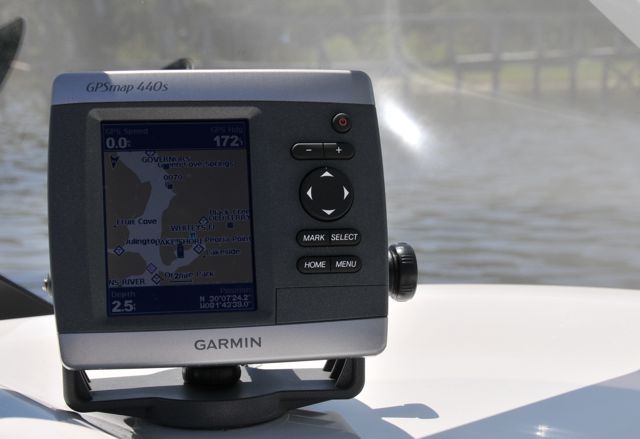
1. Make sure you get the one that fits your needs. GPS’s range in all shapes and sizes. Personally, I like to have to have one that has a 15” screen but that would be a little impractical on a 23’ bowrider. Thus I settled for the 440’s (the S means that it has a sounder or depth finder) this one has a 4’ screen and fits nicely on the boat.
2. Make sure that charts are preloaded. You will find that the price can vary between units. Many times this is due to features like weather, sounder, or preloaded maps. Note that preloaded maps may be costal or inland lakes. Theses maps provide you nautical charts that should include water depths as well hazards and other pertinent information. If your unit does not have the charts preloaded you will need to purchase them separately. Garmin sells charts for their units for around $100.00 per region. That can get expensive in a hurry. Another consideration is that purchased charts may give more detail than preloaded charts and the amount of detail and size of the region will affect the price.
3. Handheld devices can be a great choice. If you have a smaller boat or do not get out that often you may opt for a hand held unit. These can be great fun and have other uses as well such as Geocaching (http://www.geocaching.com/). Once again, it’s best to get one with charts preloaded.
4. We know and understand that the iPhone has a built in GPS as well as the ability to purchase nautical charts. However, if your iPhone is like mine, you really wouldn’t want to base your life or your boat on it. However as a backup, I wouldn’t be without it.
In Summary
• By a GPS/Charplotter with preloaded charts
• Purchase a Charting program that is compatible with your unit
• Go to the “preferences” section to set the desired degrees format (in the GPS and the Charting Program on your PC)
• Crete a few waypoints and routes on the PC
• Upload them to your GPS
• Enjoy the ride
As said in the beginning, this article is a very simplified overview to get you started. We always suggest reading your manual thoroughly in the beginning and then again after you have used the unit for a few months.
*Note: just because you have a GPS/Chartplotter does not mean that common sense goes out the window. Always use your eyes and be aware of your surroundings.
Helpful links and more information:
https://buy.garmin.com/shop/shop.do?cID=148
http://www.mrsps.org/gps_course.htm
http://www.gpsvisualizer.com/geocoding.html
http://sailing.about.com/od/navigationseamanship/a/basicchartplotter.htm